.png)
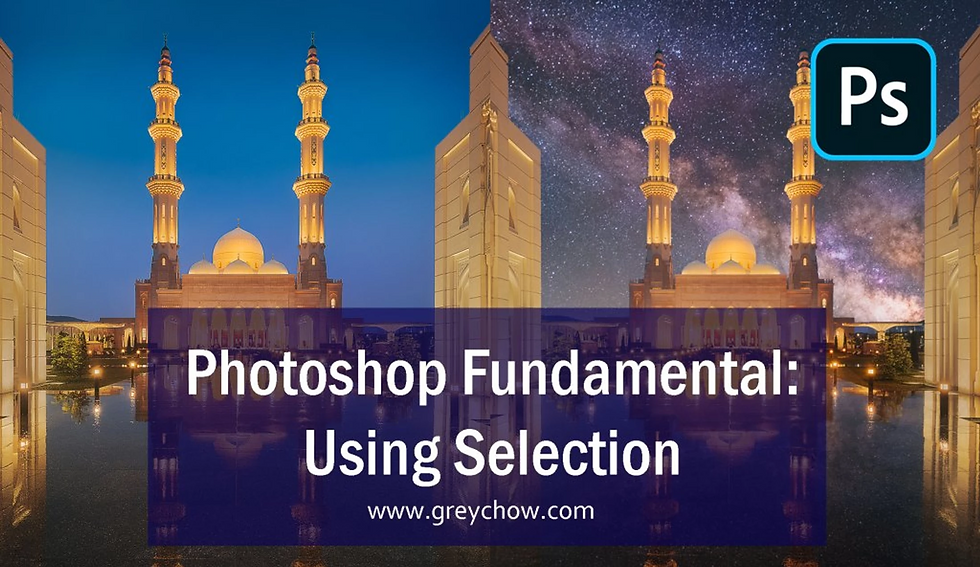
Photoshop Fundamental: Using Selection
- grey1217

- Jan 7, 2020
- 4 min read
Updated: Sep 16, 2021
In my previous blog post, I have talked about the LAYER and LAYER MASK, which are the most important fundamental in Photoshop.
If you wish to master Photoshop, the next thing you should be familiar with is using SELECTION. 🙂
If you haven’t read my previous blog post and have no other about LAYER and LAYER MASK, please check out the post HERE. So that you will have a better understanding of the steps I’m going to mention later here.
What is Selection?
SELECTION is basically selecting an area/subject in the photo.
With the selection, you can restrict your adjustment to apply only to the SELECTED AREA. In other words, perform a SELECTIVE ADJUSTMENT.
Why do you need Selection?
As mentioned before in my previous post, SELECTIVE ADJUSTMENTS is the KEY to produce a well-edited photo.
Same as what you can do with using a BRUSH tool to brush on a LAYER MASK to make a SELECTIVE ADJUSTMENT.
You can create a SELECTION and apply it to a LAYER MASK to make a SELECTIVE ADJUSTMENT.
Let me give you an example here.
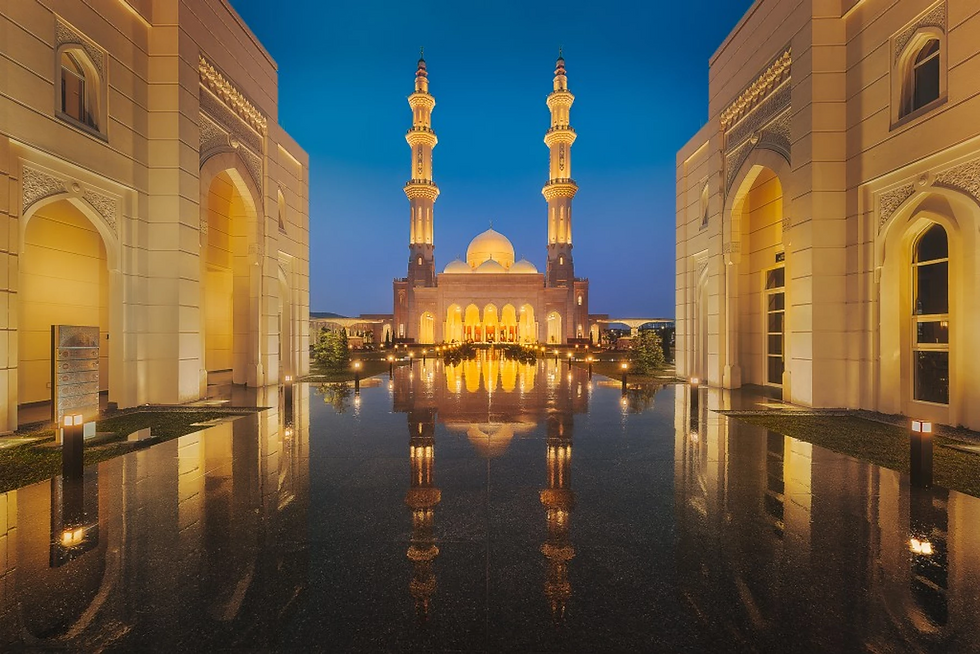
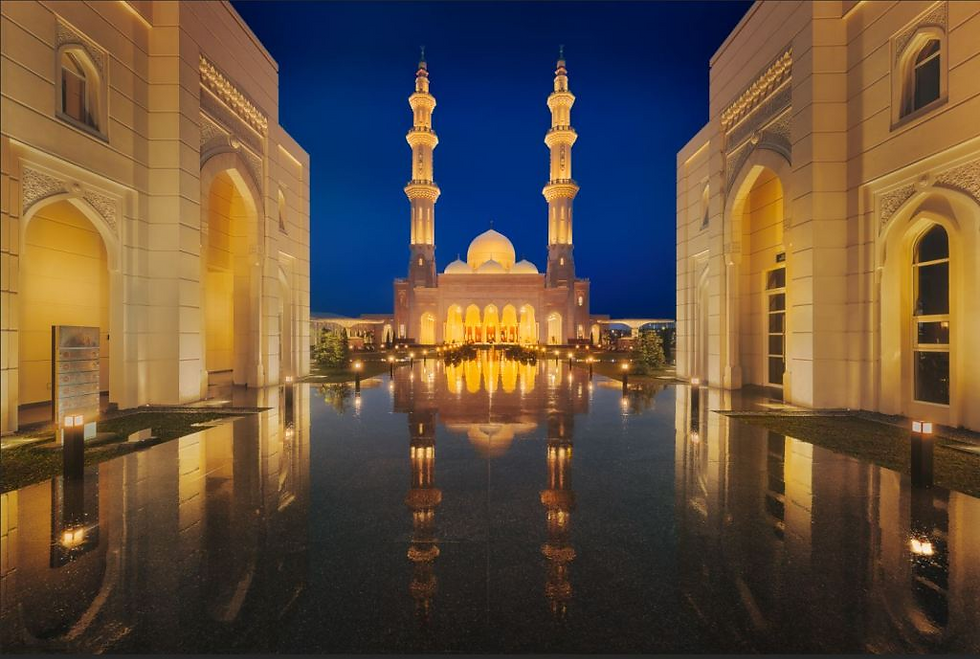
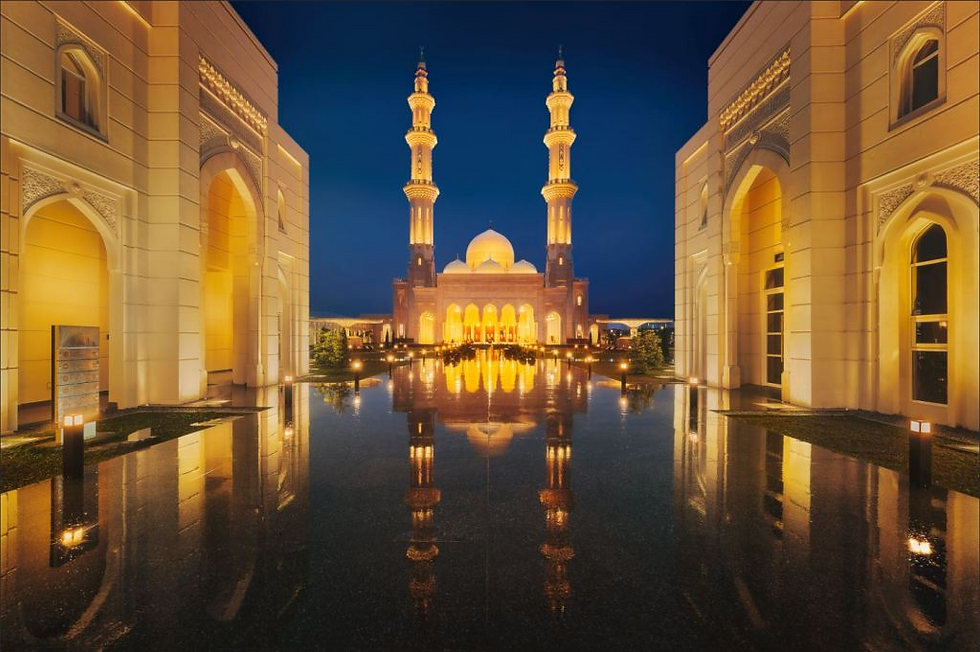
Here’s a photo of the Sri Sendayan Mosque in Seremban state, Malaysia.
I already performed a few adjustments to the photo, but still, I feel that the photo is not punchy enough.
I want to emphasize my main subject more, which is the mosque here.
So, I’m going to darken the sky here.
I create a SELECTION using one of the Selection Methods (which I will explain more later) to select only the SKY.
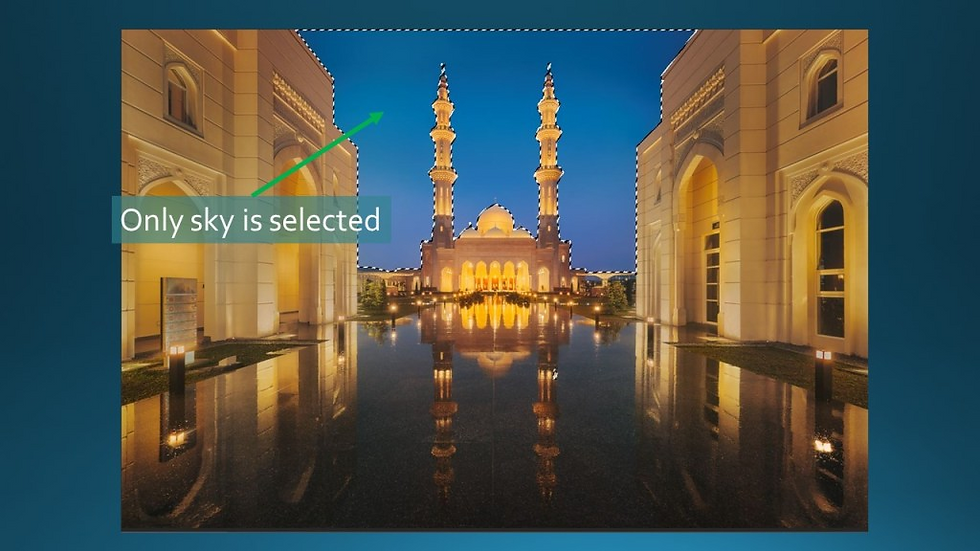
Then, I add a CURVE ADJUSTMENT LAYER and apply the SELECTION to the LAYER MASK of that layer.
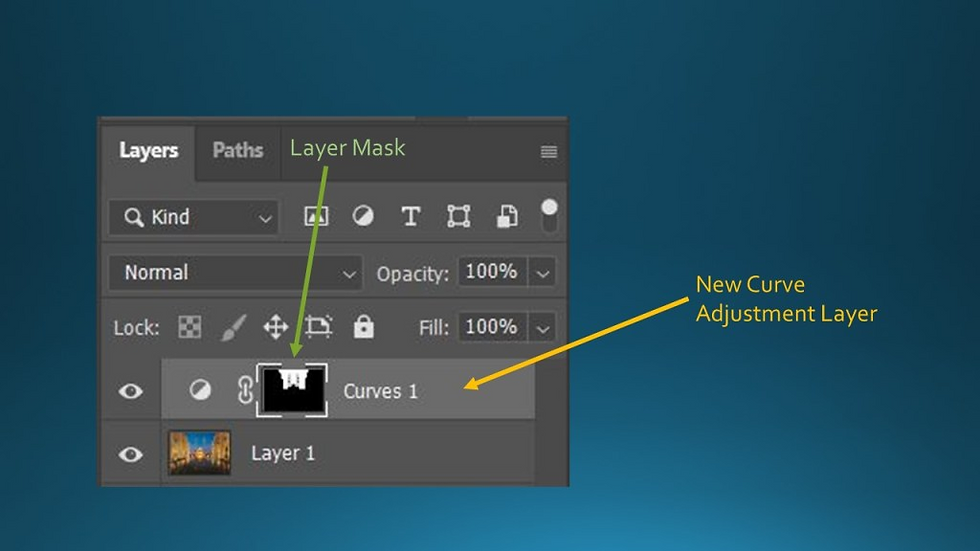
Now, I can make the adjustment to darken only the sky.
As you can see, only the SKY is affected.
If you check on the LAYER MASK by holding down Alt and LEFT CLICK on the LAYER MASK, this is how the MASK looked like. Repeat the same step to exit the Layer Mask View.

It is possible to use a BRUSH tool to brush on the LAYER MASK to apply the adjustment only to the SKY but it is not easy to get it nicely done. Here’s an example of poor masking results using the BRUSH tool.

I can also use the same SELECTION on other ADJUSTMENT LAYERS.
Now I feel that the blue colour of the sky is oversaturated, I want to make it more natural.

To fix that, I apply the same SELECTION on a HUE/SATURATION ADJUSTMENT LAYER and then tune down the SATURATION of the sky.
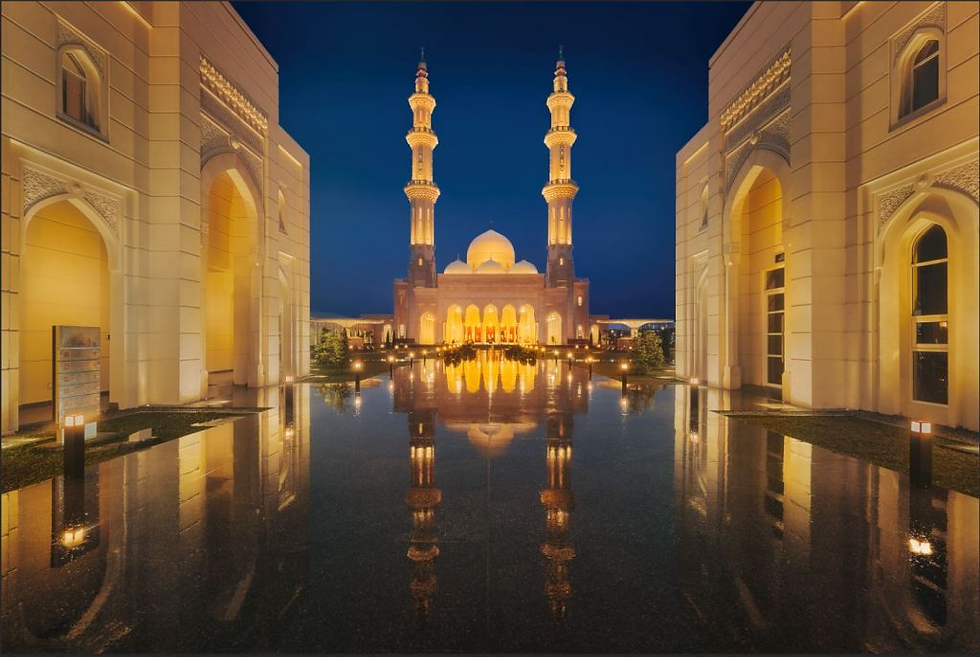
It looked much better now. 😄
Of course, I can also create another SELECTION only for the MOSQUE.

With only the mosque is selected, I created another CURVE ADJUSTMENT LAYER to add more contrast to the foreground.
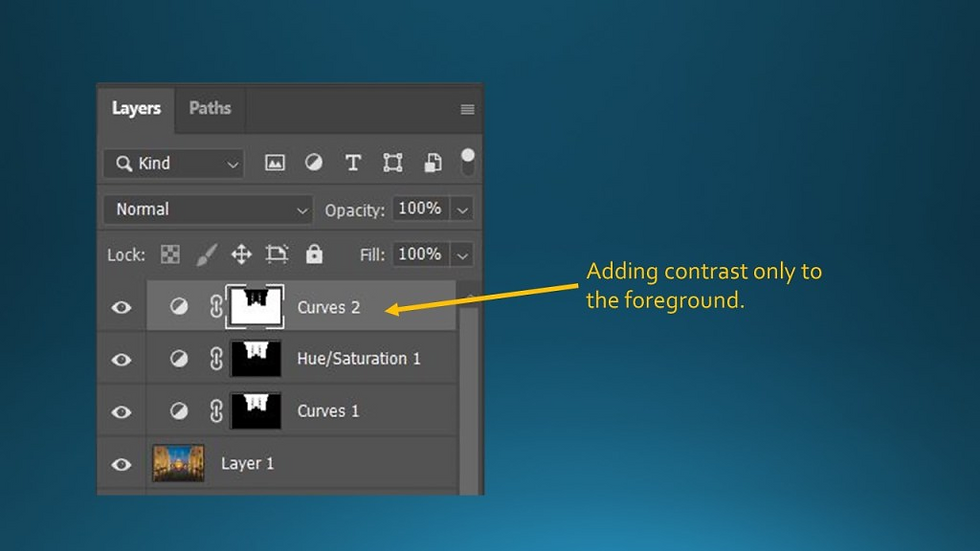
Now the contrast is increased for the foreground.
Here’s how the LAYER MASK looked like.

Other than making adjustments, you can also use SELECTION for SKY REPLACEMENT.
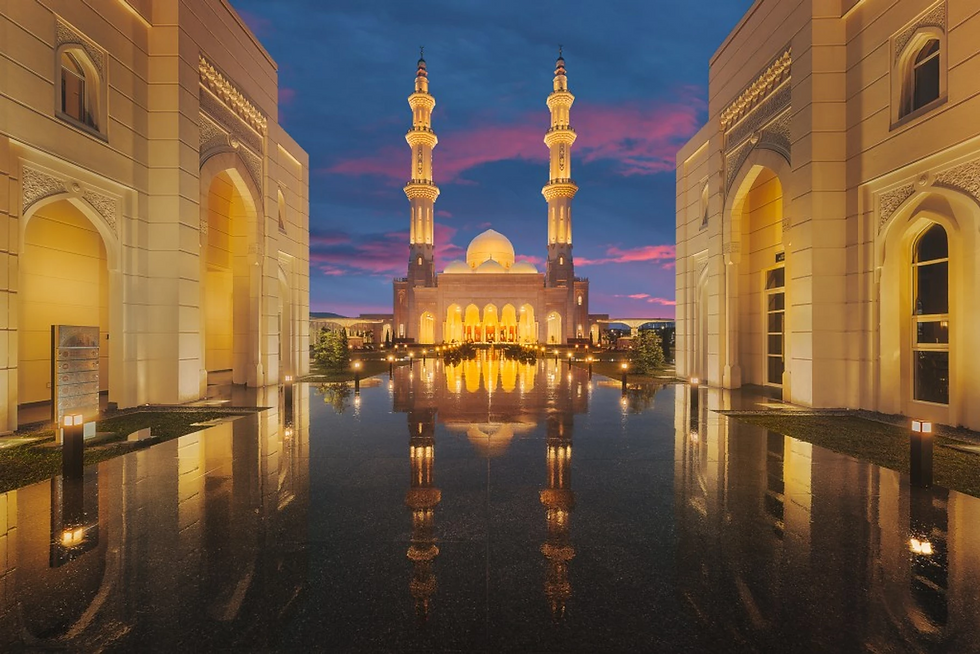
Now I have replaced the sky with another sunrise photo.
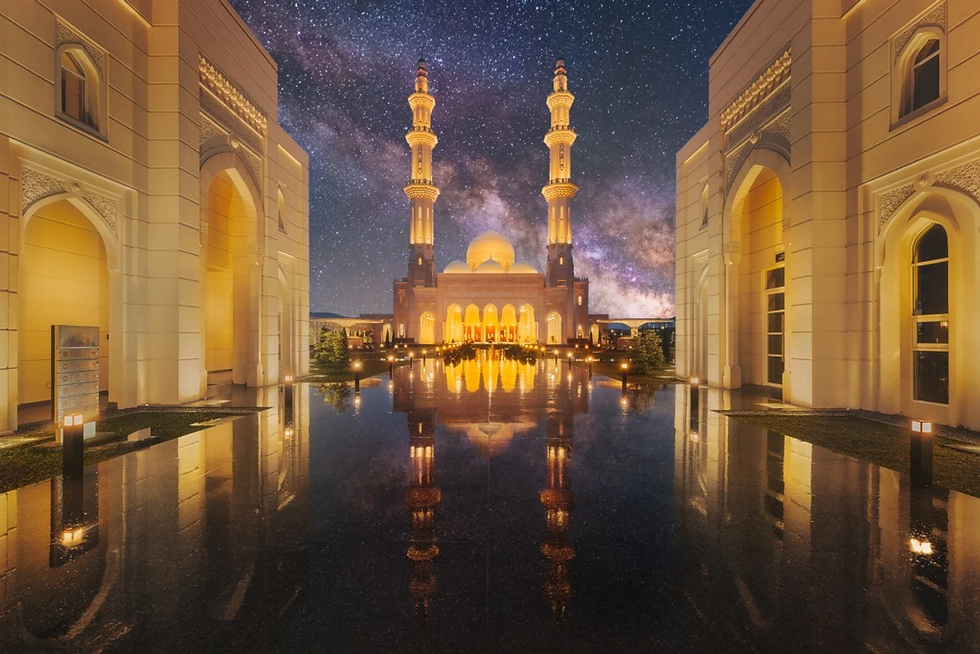
You can even add in the MILKY WAY if you want. 😛
Create a Selection
There are various ways to create a SELECTION in Photoshop. Usually, people would use LASSO, POLYGONAL LASSO or MAGNETIC LASSO Tool to draw a SELECTION on a photo to select an area/subject. These are the most straightforward but also the most manual methods.

Color Range and Focus Area Selection

There are other advanced methods to create a SELECTION based on COLOR RANGE or FOCUS AREA.

For this photo, you can use the Color range selection to create a SELECTION base on BLUE COLOUR. Because the SKY is blue color, this will select only the sky.

If you want to use the Focus area, you can create a SELECTION base on In-FOCUS RANGE. For this case, I would say Focus area selection works better than Color Range selection here. It is able to select only the foreground subject without the sky.
Channel Selection
This is a more complicated way to create a SELECTION, which is based on RED, GREEN and BLUE (RGB) Channels to create a SELECTION.

It is kinda complex to explain this, I will need to write another blog post in future for it. Stay tuned. 😉
For beginner
If you are very new to Photoshop, I would suggest you start using Lasso Tools first. It is the most manual method but also the most straightforward. For other methods, they depend on what is your selection criteria.
For example, Color Range selection will only work if you want to create a selection base on a single colour. For Focus Area selection, it is base on the focus range, and RGB Channel selection is base on the tones (Red, Green, Blue).

Join our Photography Masterclass Community & improve your photography skill.
Subscribe to receive photography tips & tricks and update from Grey Chow
Please feel free to share this post if you enjoy reading it! :)


Comments