.png)
The Flow Of Time
- grey1217

- Aug 25, 2016
- 4 min read

Mount Bromo, one of the most popular active volcanos on the earth. Enthusiast (Visitor) from all around the world comes here just to witness the magnificent view of the iconic Mount Bromo under the magnificent sunrise. But if you come at the peak season, beware of the massive crowd; it is like Angkor Wat in Cambodia.
Me and my friends spent 6D5N in Java Island, Indonesia hunting for Milky Way and sunrise. We start with Ijen , a volcano crater famous with sulfur mining and a unique phenomenon known as “Blue Fire” , an ignited sulfuric gas, which emerges from cracks at temperatures up to 600 degree Celsius.

On second day once we come down from Ijen Crater, we off to Papuma beach, a beautiful beach at the south side of Java island. Spent another 2 days there, only we proceed to Bromo as our final destination.
At the fourth night of the trip, we leave our homestay at 7 a.m. and reaching the Penanjakan 1 view point at around 8 p.m. where spent the whole night there until sunrise. It was cloudy when we were there, and the waits in an open view at the peak area was quite an unpleasant experience, it is just too cold for Malaysian like us that live in a tropical country, especially with the gusting cold wind. XD
I was making a Timelapse Photography, with at least 2 hours shoots. Thou I am actually framing the shoot with star trail composition in mind, in the end I have a timelapse video + a star trail photo, one stone kill two birds. 🙂
Shooting Info:
For star trail, I took a total 120 photos with each photo at 16mm focal length, ISO 4,000, f2.8 and 25 seconds shutter speed.
For foreground, I took 5 exposure bracketing at 16mm focal length, ISO 1,000, f4 and shutter speed from 4 seconds to 60 seconds. I also took another extra shot using 240 seconds shutter just for the light trail.
Timelapse video
A compilation of timelapse video for our Ijen, Papuma & Bromo trip, and I also set up another Nikon D700 as the secondary camera to take the timelapse video of us taking the photos. Although it gives me an extra weight on my back but worth it. P.s. a great thanks to my friend Max Ng on borrowing me the D700! 😀
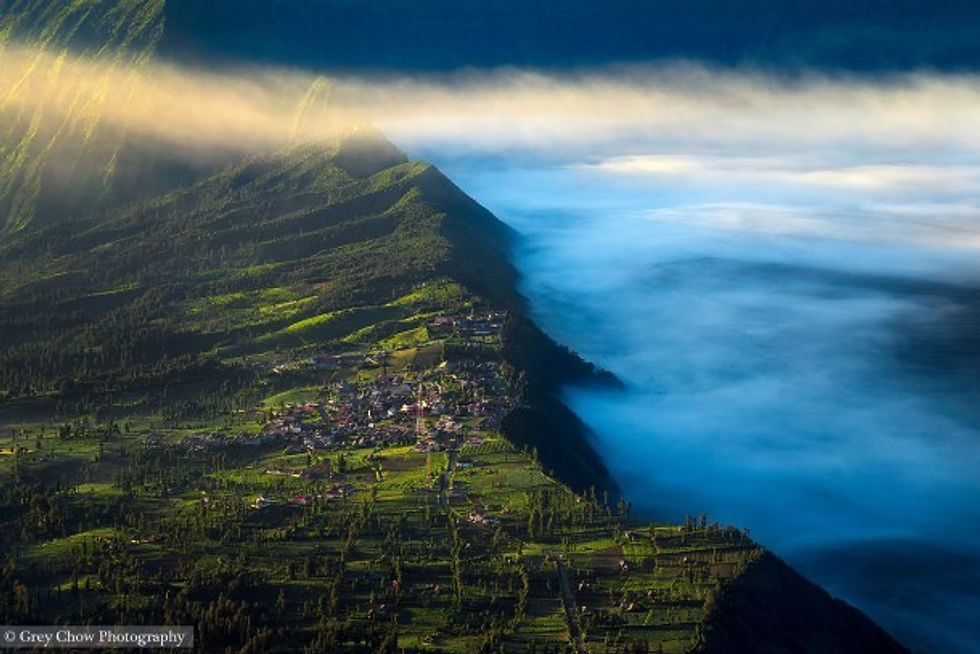
The close up angle at the village
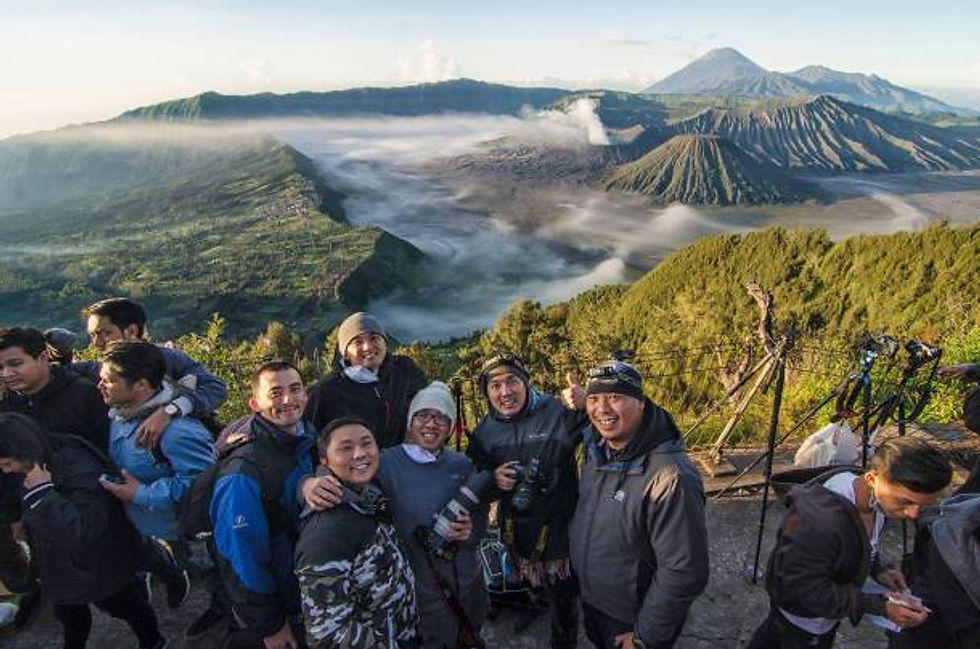
Happy photographers at Penanjakan 1 view point.
The post processing is split into two part:
Part 1: For Star trails, I imported 120 photos into Lightroom, doing minor adjustment on the color balance & lens profile, exporting all into JPEG format instead of TIF format, this is to reduce the total Photoshop file size later when loaded all into the Photoshop. Using the load photo into stack, I able to have all the photos in one Photoshop file with each of them appear as a layer. I select all of the photo, except the last one in the bottom, changing the blending mode into lighten, a simple version of star trails is done. But to make the star trail having some sort of “meteor” look, I changing all the opacity for each layers by slowly decrease it one by one. Once done, I merge and export the photo, in later stage I will blend it together with foreground photo.
Part 2: I use the photo before the dawn as the “base” layer, using another -2 exposure to recover the overexpose area. With another additional photo I took for the light trail, I blended in together to create a complete smooth light trail. Next I import the star trails photo, and blended it carefully for the sky, due to there is huge different between the time I took the star trail and also the time I took the foreground photo, I will need to have some extra tweaks on the color balance and the brightness to make sure it can blend in naturally. Once I have both the star trails and light trails in place, is time for “clean up”, using mixture of healing brush tools and the clone tool. I remove all the unnecessary lights spot that created by the tourist’s torch light or vehicles and also the branches at the left corner, anything that I feel is distracting. I decide to add some warm tone on the image to create more color separation and it also help bringing more vivid color on the lights trails. In the original photo, the hill at the bottom right appear to be more yellow comparing with the volcano at the back and the cliff at the right, I using the selective colors adjustment layer to change the color so that it appear to be greener instead of yellow, to match with the rest. I also decrease the brightness on the hill so that it won’t distract the viewer’s eye. Then I go into Nik Software, giving a push on the photo contrast using Pro Contrast & Tonal Contrast filter. Next I perform dodge & burn on the photo, to make the volcano, fog and the village on the cliff more “pop” from the rest. And I have perform sharpening using the high pass filter. Other than the usual contrast adjustment & color saturation, I perform “Color Painting” on the volcano’s highlight area, by create an empty layer with “color” blending mode and a luminosity masking selected only the highlight, I apply the brush on the volcano. This giving warmer colors on the highlight. Lastly I added vignette, perform noise reduction with Nik Dfine, and export the final image.
Here is the before & after comparison.


Please feel free to share this post if you enjoy reading it! :)


Comments