.png)
How to remove lens flare from your photo
- grey1217

- Jul 12, 2022
- 2 min read

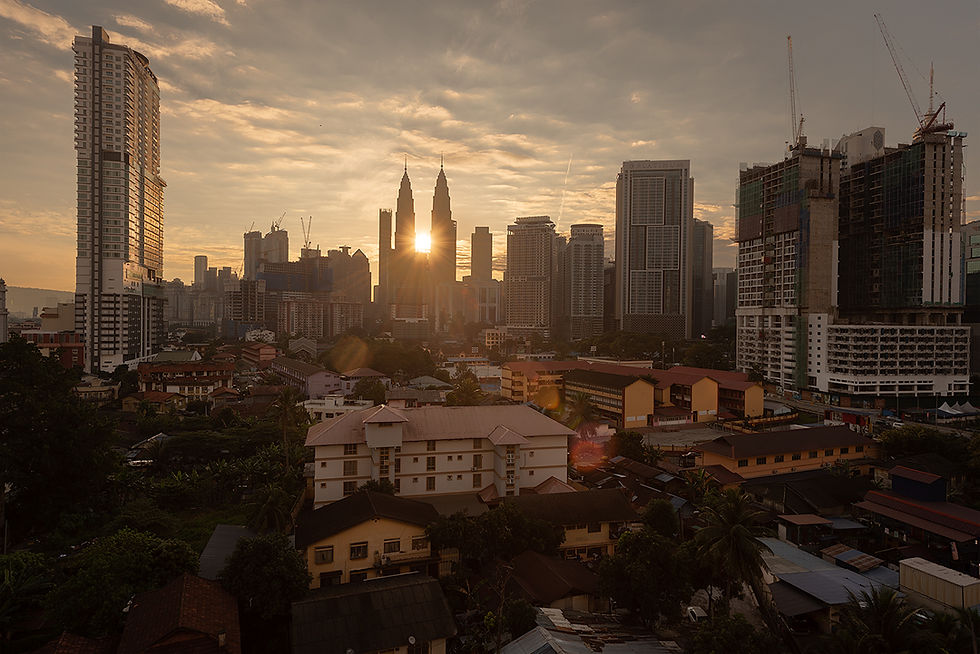
Shooting into the sun can capture a high-contrast image that gives a strong sunlight vibe. It is often what landscape photographers like to do to create stunning images.
However, lens flare can also happen when the sunlight directly hits your lens. Some photographers like the flare because they feel that it enhances the mood and make a scene more artistic, but for landscape photographers, we usually would want to remove it, as it can cause a huge distraction from focusing on the scenery.
Here I want to share with you a simple technique to remove the lens flare, which I call "The Finger" technique.

The idea is to take two photos of the same scene using the same camera settings. The first one will be a normal shot, but when taking the second photo, you put your finger in the frame and block the sun.
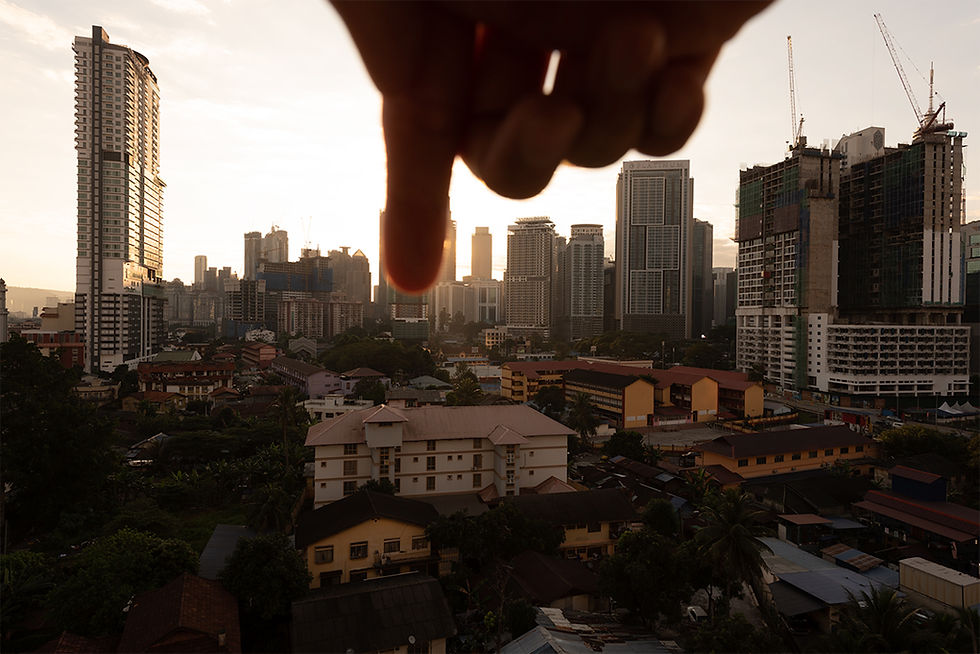
With the sun being blocked, the flare disappeared.
So, you now have two photos, one with the flare and another one with a finger but without the flare.
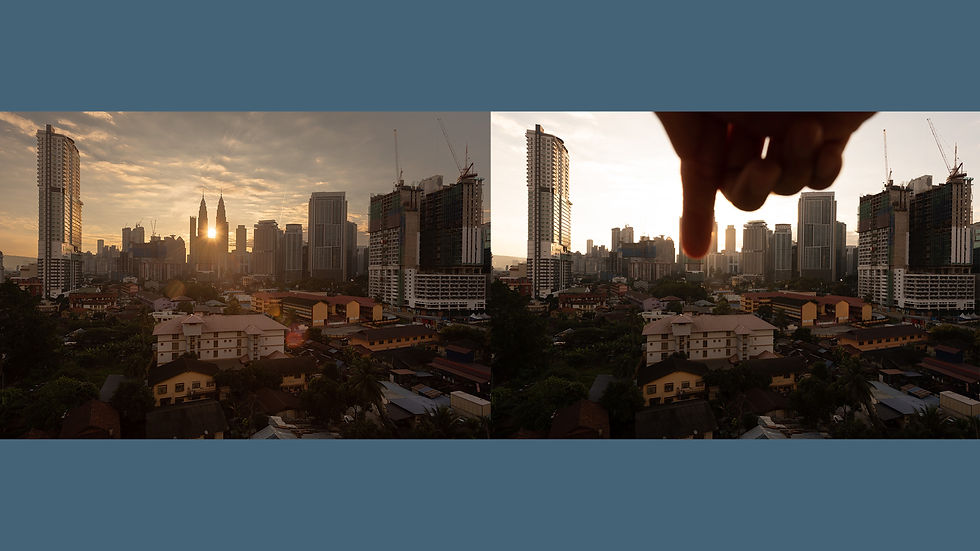
Note: I have recovered the overexposed highlights for the left photo, which I usually do before removing the flare.
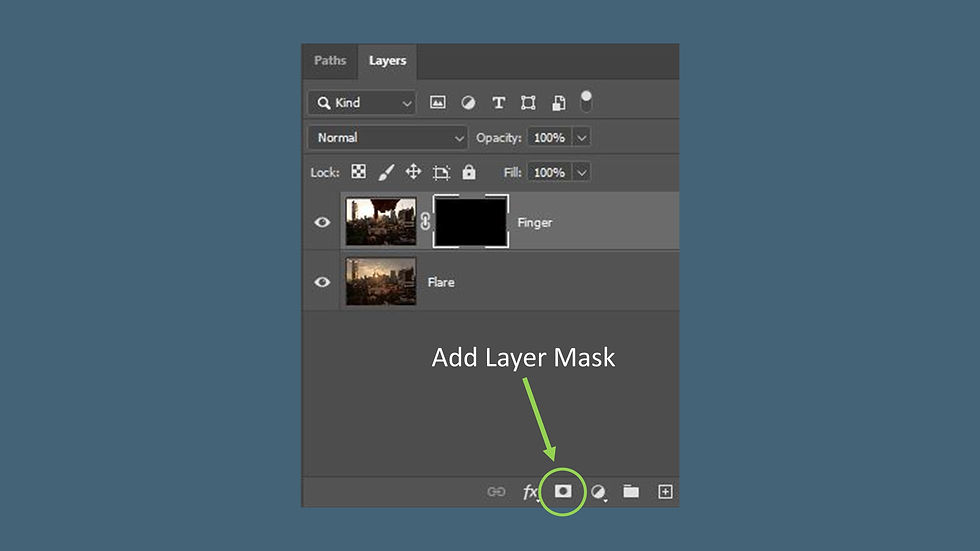
Then, you import both photos into Adobe Photoshop as two different layers in the same file.
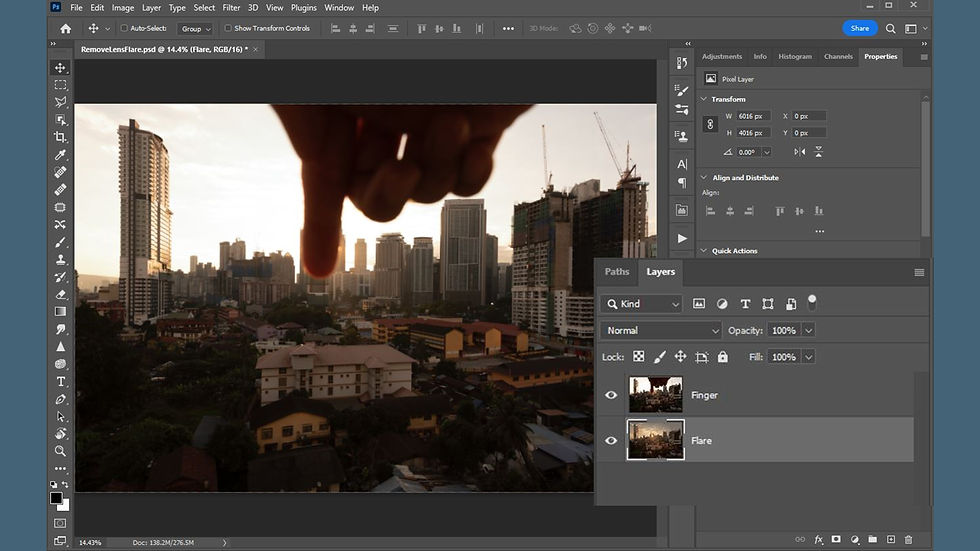
Make sure that the photo with the finger is the top layer. Select the finger layer and click on the "Add layer Mask" icon while holding down Alt/Opt button to create a black layer mask.
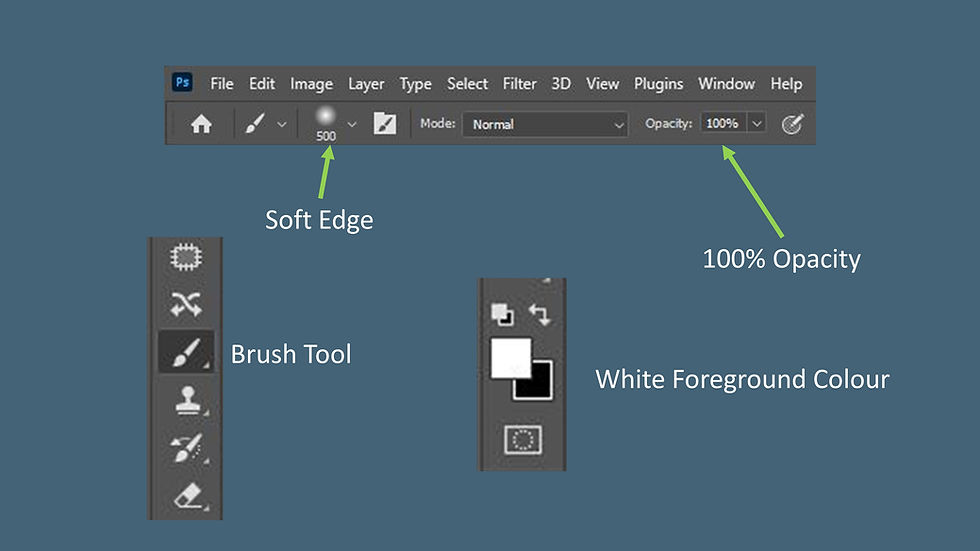
From there, you select the brush tool with a soft edge, white foreground colour and 100% opacity.
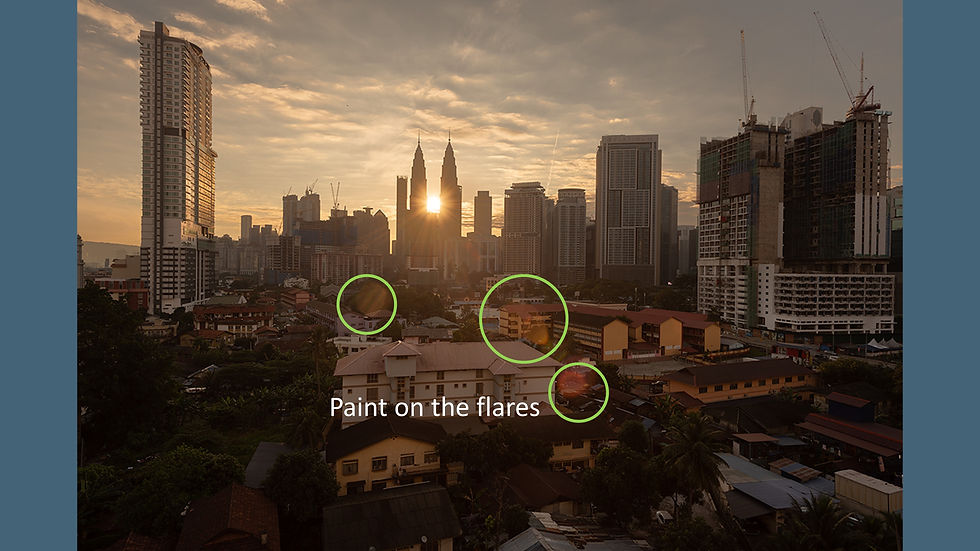
Then, start to paint the flare area, to remove the flare. Pretty simple right?
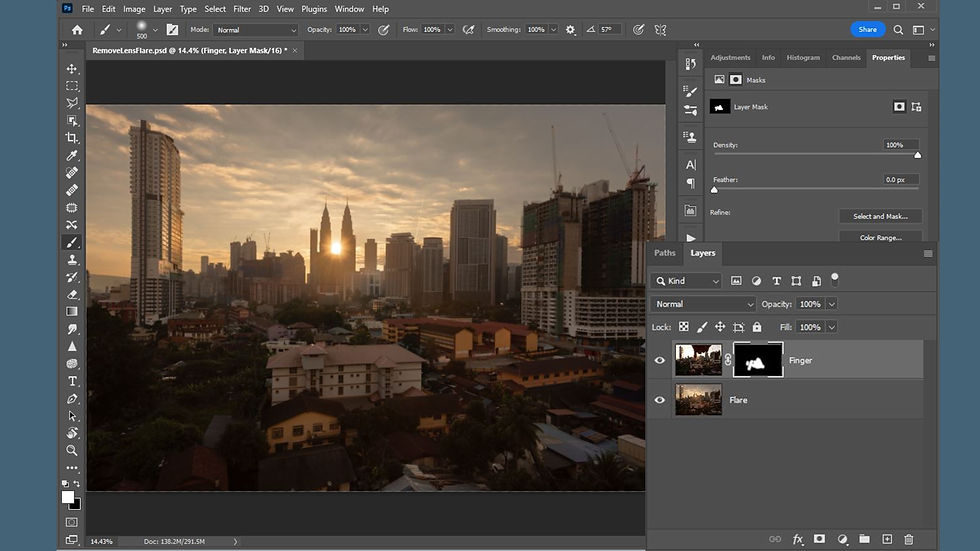
If the exposure or colour of the finger layer doesn't match the background well, you can also add a curve or colour balance adjustment layer on top of the finger layer, right-click on it and choose to create a clipping mask. With that, you can make any necessary adjustment that affects only the finger layer.

Basically, what we are doing here is to put the area without the flare from the "Finger" layer on top of the bottom layer. It is one of the ways of using the Digital Blending technique in Photoshop.
If you take bracketed shots, you will need to take another extra "Finger" shot after you have done bracketing. Then, perform the usual exposure recovery step first and remove the lens flare.
Other than using the "The Finger" technique to remove the flare, if your lens has a UV filter attached, you can also try to remove the filter to see whether it helps to eliminate the flare. Unlike the glasses on our lens, which have a coating to reduce flare, a UV filter may cause more unwanted flare on your photo.
That's all for now.
Happy shooting!
Grey Chow


This article explains practical ways to deal with lens flare in photography, especially when strong sunlight enters the lens and creates unwanted bright spots, haze, or streaks that can distract from the main subject. I like how it highlights both preventive shooting techniques, such as adjusting camera angles, using a lens hood, or repositioning to avoid direct light, as well as post-processing solutions like blending exposures, using healing tools, or removing flare in editing software. The idea of combining smart shooting decisions with careful editing really shows how much control photographers can have over the final image when both planning and post-production are used effectively. It also reflects how small technical adjustments can significantly improve overall image quality and clarity.…
Ce qui impressionne dans la démarche de Sotheby’s Realty Maroc immobilier de luxe, c’est la manière dont elle réussit à lier authenticité et modernité. Les villas côtières côtoient les kasbahs revisitées, les riads rénovés rencontrent les architectures contemporaines, dans une harmonie parfaite. Chaque projet est pensé avec exigence, depuis la sélection du bien jusqu’à la mise en valeur de son potentiel. L’accent mis sur la qualité, la transparence et la confiance transforme chaque acquisition en une expérience sereine et inspirante. Dans un marché où le prestige repose autant sur l’émotion que sur la valeur, cette approche fait toute la différence.