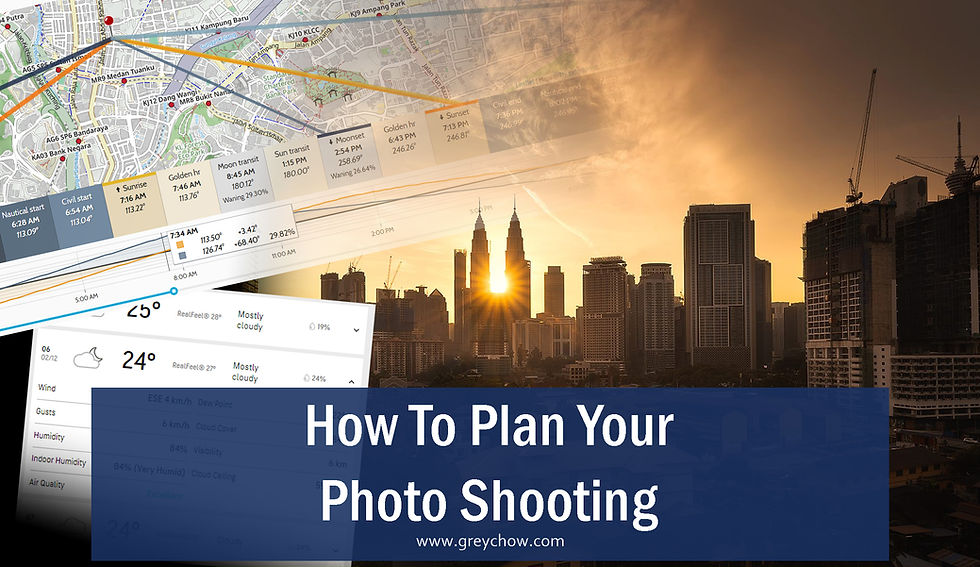
.png)
5 Tips To Plan Your Photo Shooting
- grey1217

- Dec 8, 2021
- 4 min read
Many people talk about camera settings, composition and post-processing, but they seldom talk about how important it is to plan your shooting.
Good planning helps you know your shooting location better so that you can get a good composition and visualize ahead of how you should capture the photos. Thus, increase your chance of getting some stunning photos from the place.
Without wasting any more time, let's get into the five tips that I want to share with you on how to plan your shooting.
1. Find photo reference
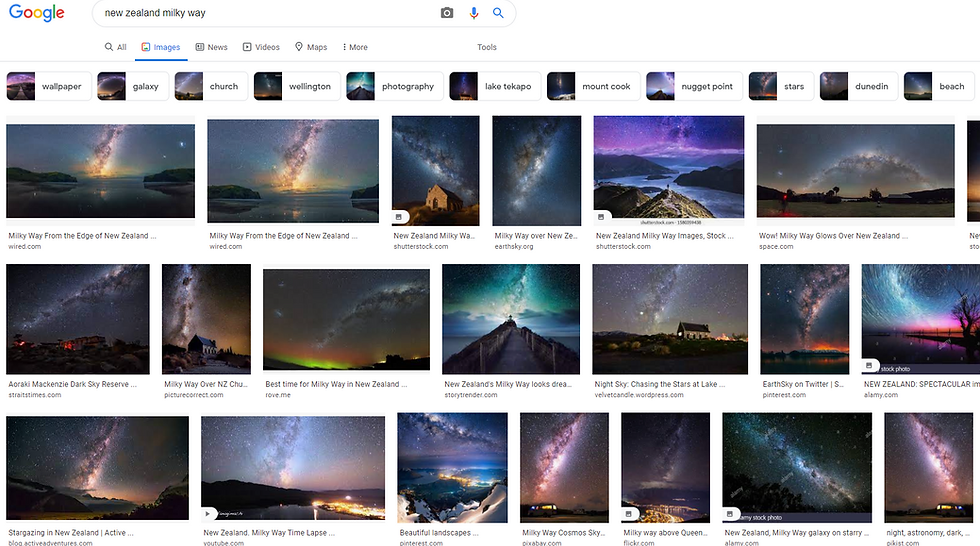
If you already have some places or countries in your mind, you can do a google search about the places and then look for any good photos for your reference purpose.
You can search on google using keywords such as "the most beautiful places in xxx", "sunset", "sunrise", or "milky way" together with the place you plan to visit.
Google usually will return you a list of web pages, which you can go through if you find any title that interests you, or you can click on the "Image" tab to check out a list of photos related to the search keywords.
Usually, I prefer the 2nd option.
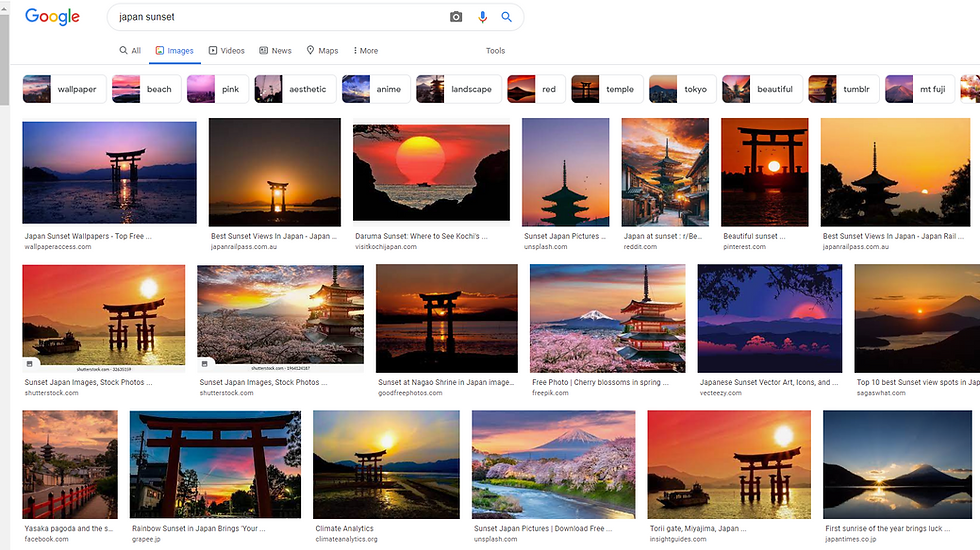
By searching for "Japan Sunset", I found quite a number of suitable places for photo shootings. It is the same if I search for "New Zealand Milky Way".
2. Google map & street view
After deciding which location to go to, I would check out the place using Google Map & Street View.
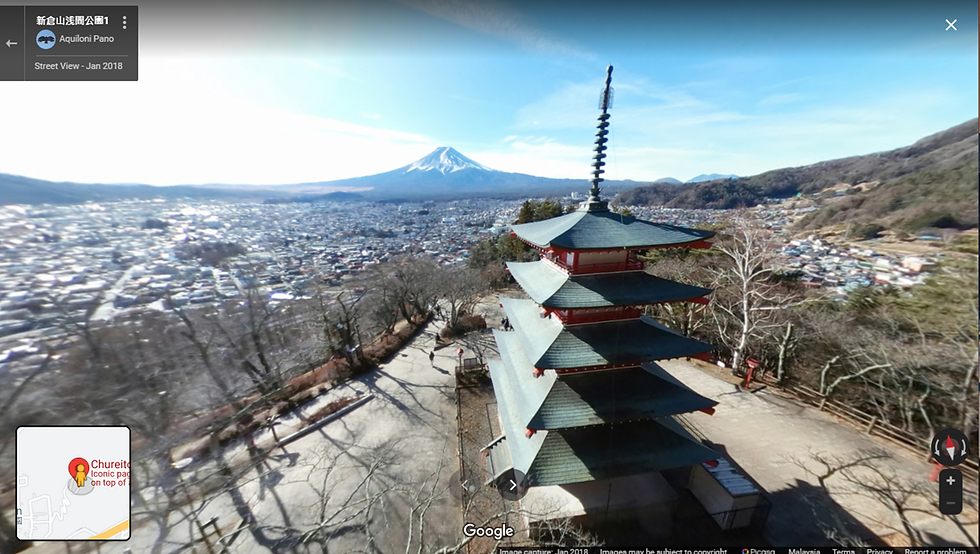
Let's search for Chureito Pagoda in Japan as an example. (P.s. a place I have yet to visit but is on my shooting list)
From the satellite map view, I can tell that it is facing the west direction, and it is suitable for shooting the sunset. I also can confirm that those photos reference that I found earlier are not superimposed. So at least I won't get disappointed and waste the trip to get there.
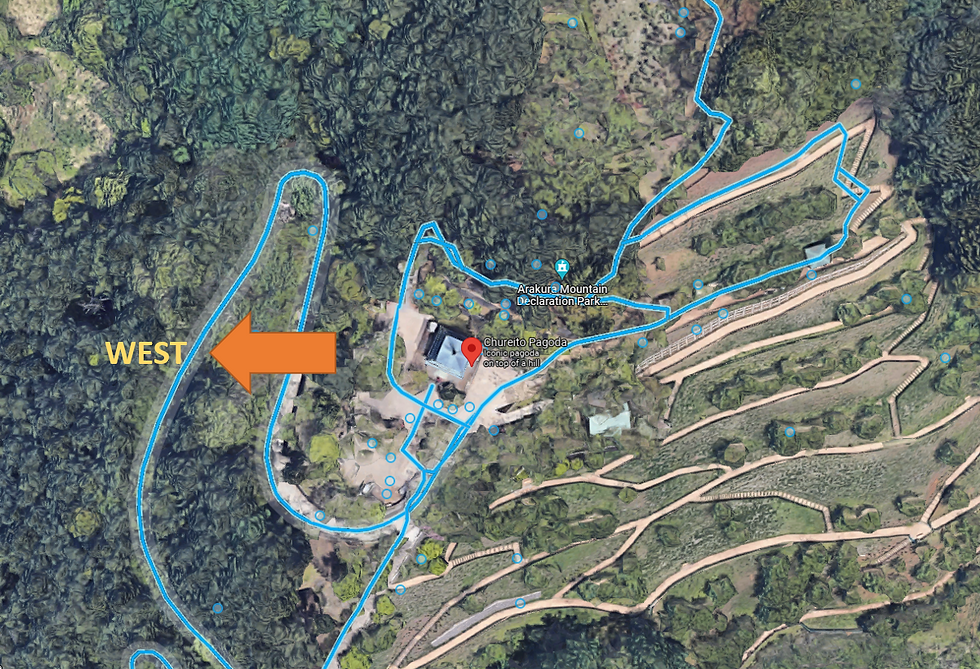
If you click on the yellow man icon at the bottom right of the google map, the map will be labelled with lines and circles, which you can then click on them to open up the street view for that area.
Now you know from the street view, the best spot to capture the sunset together with the Chureito Pagoda is from the hill behind the pagoda. I may also need a longer focal length to bring the Fujisan mountain in the background closer to the foreground, using the lens compression effect.
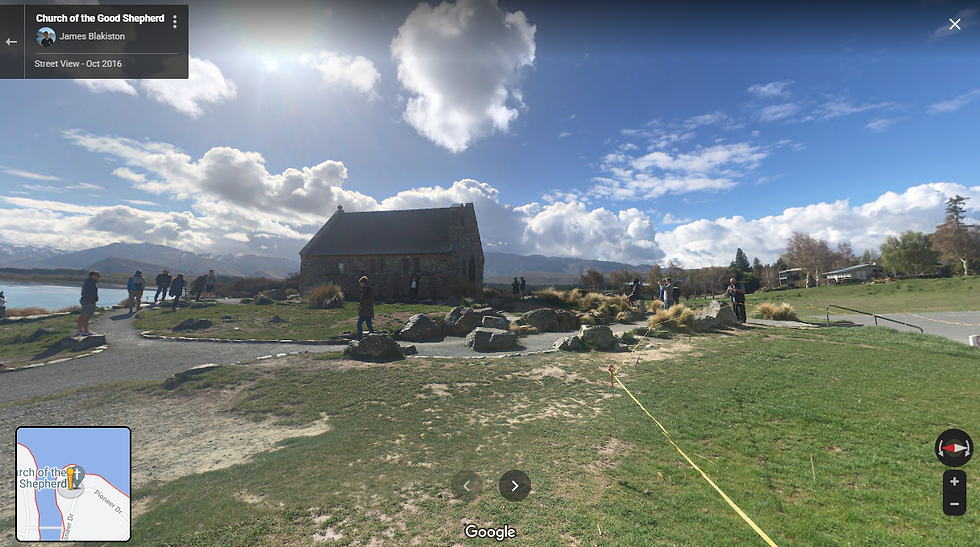
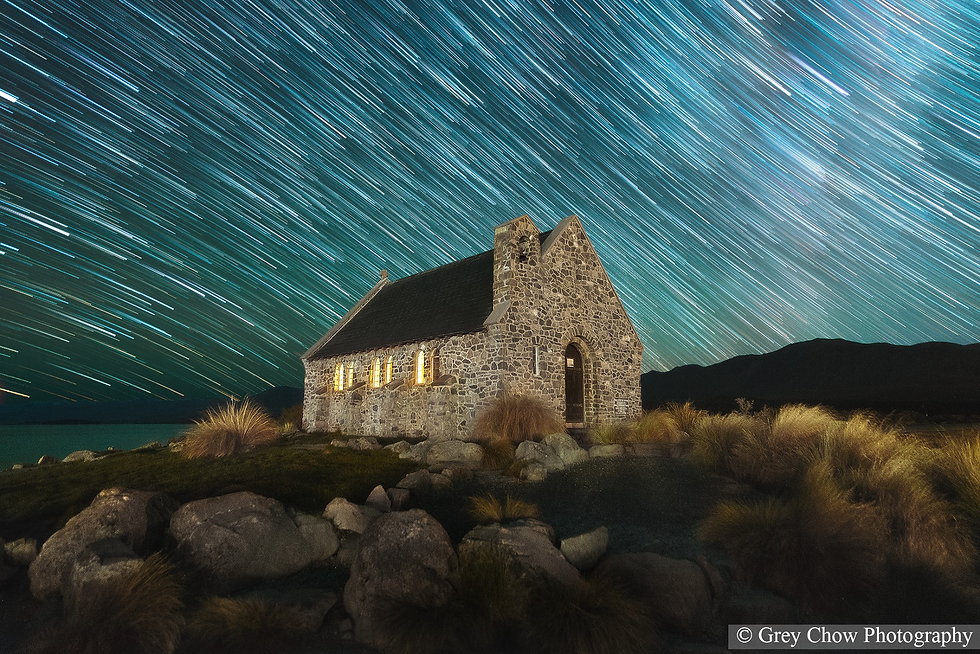
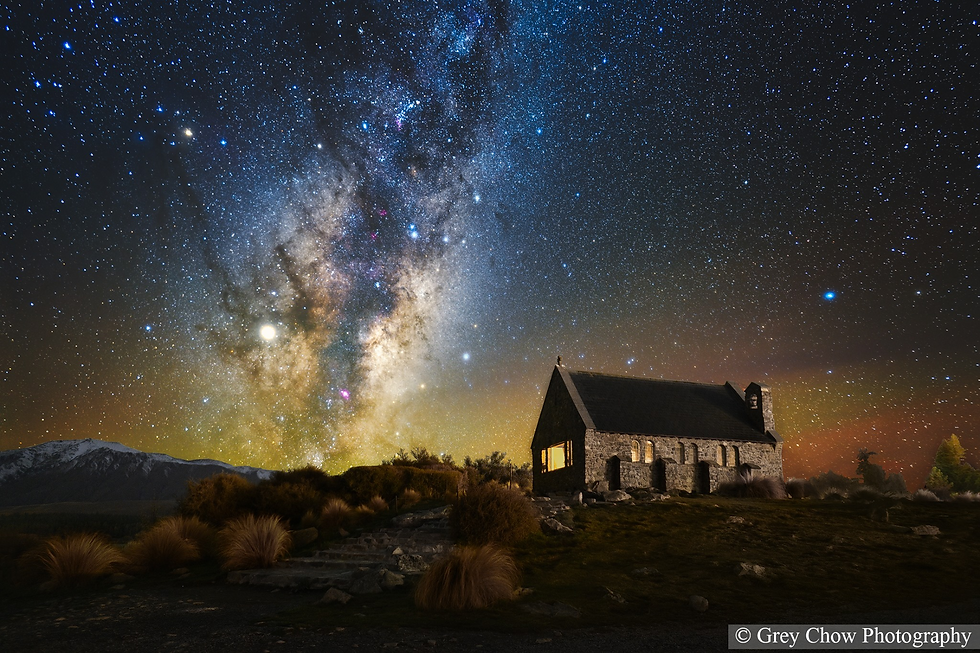
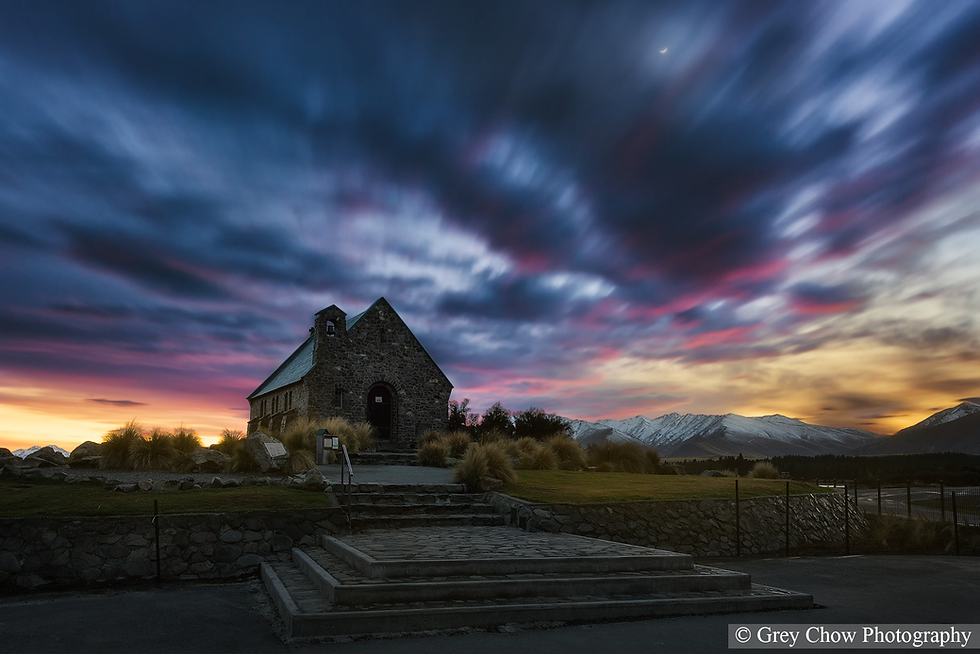
I use the Church of the Good Shepherd in New Zealand as another example, which below is the street view of the iconic church and then the photos that I took from there.
3. Check out the sun rises time, set time and direction.
Now, you know where to shoot and what to shoot, the next step is to find out when to shoot.
You can visit the timeanddate website and search for the sunrise and sunset times in an area. The site will then shows you a detailed table, listing out the sunrise, sunset, blue hour (Astronomical twilight, nautical twilight and civil twilights) for every day in every month.
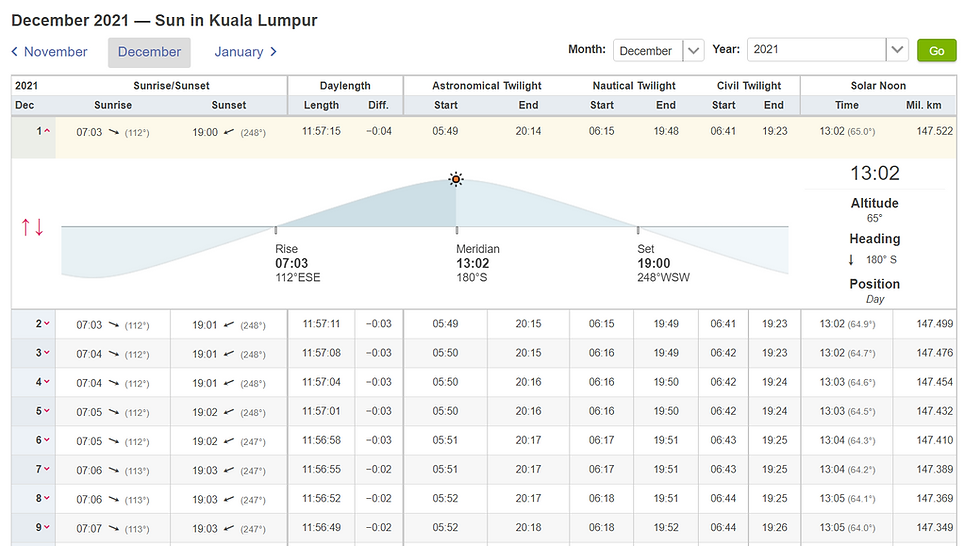
From there, you will be able to plan your shooting accordingly.
You may also want to check out the sun direction by visiting the photo ephemeris site if you prefer to have the sun shows up in a specific position within your frame.
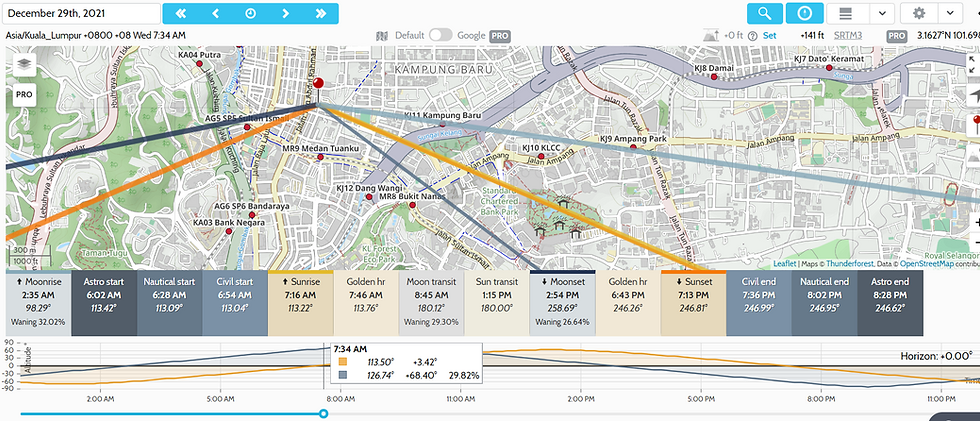
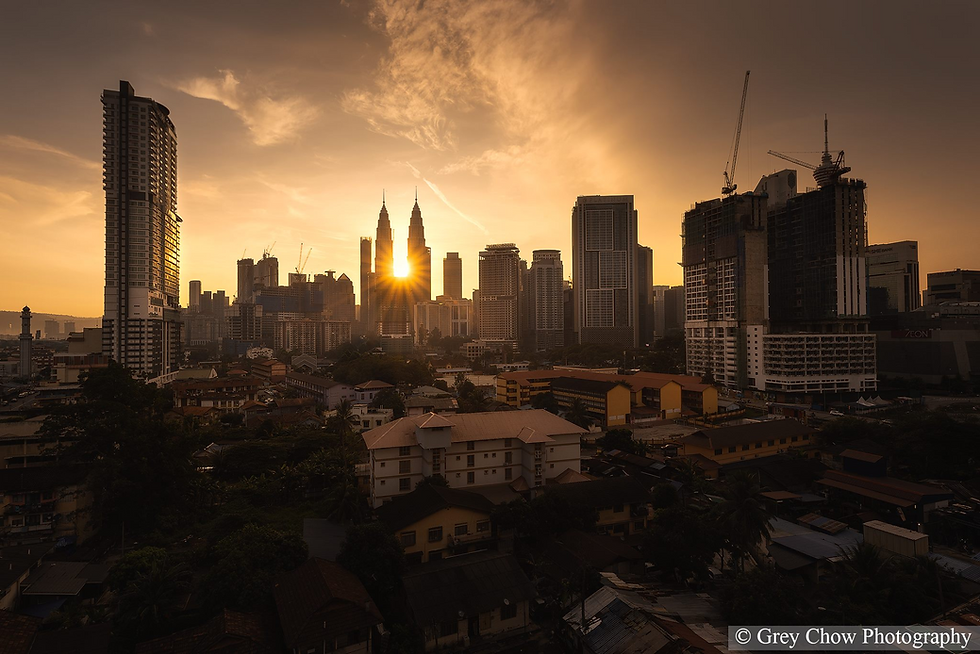
For example, capture the sun when it is between the Petronas twin towers in Kuala Lumpur, Malaysia.
Not only for landscape photography, but you should also do the same when photographing the Milky Way.
4. Weather and tide forecast
Although it may not be compulsory, it is always good to check out the weather forecast before you proceed with your shooting. This helps to set your expectation of the photos you may capture. You may also want to prepare a plan B. Should you change your composition to focus more on the foreground? Or, try out different shooting techniques such as long exposure to make the cloudy sky more interesting. Or, should you just postpone the shooting to another day when there's a better chance?

Above screenshot is from Accuweather website.
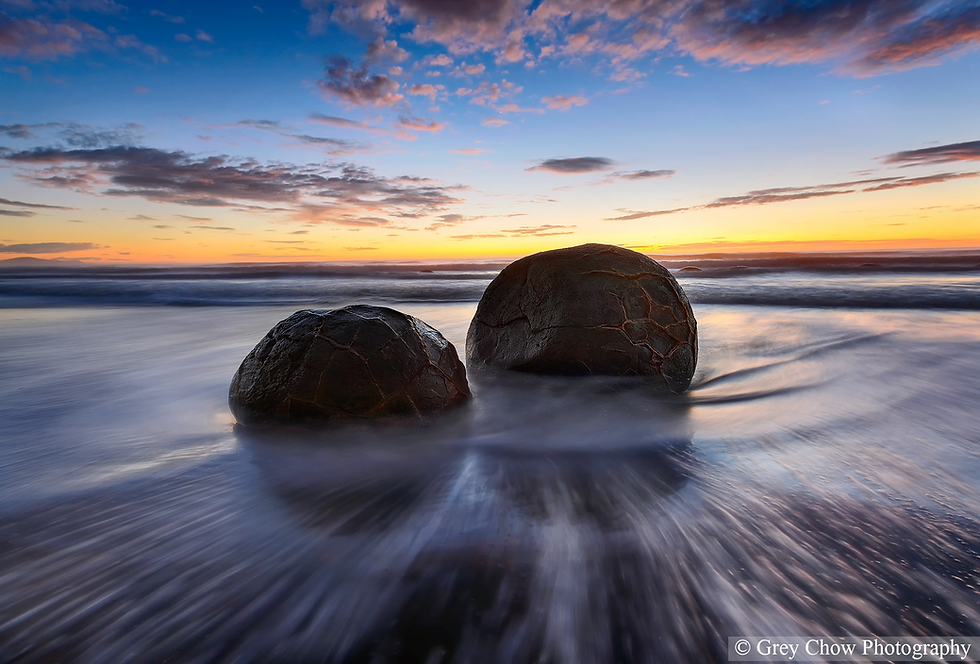
If you plan to take photos at a beach, you may also want to check out the tide chart. Some places are better during the high tide, which you can use a slow shutter to smooth out the water for a cleaner composition.

However, for other places during the low tide, you may have access to a certain angle and get close to a certain subject for the photo.
5. Be there earlier
My last piece of advice is not entirely about the planning, but it helps you to understand your shooting location better by being there earlier and spending some time exploring the area.
Instead of rushing for the shooting, you can take time to try out different compositions and find which one is the best.
The rest, you just need for the right time when the good lights hit the foreground and fill the sky with beautiful colours.
That's all for now. I hope you enjoy the reading and if you find this article helpful, feel free to share it with your friends.
Happy shooting.
Grey Chow


Comments